- About CDI

 We Have New Lewis Deck Installation Videos
Installation:
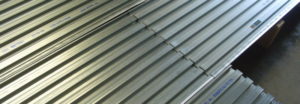
Lewis Deck Dovetailed sheeting is easy to install. These general recommendations are based on more than 75 years of experience.
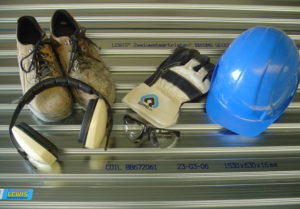
Before you start – Safety:
When laying LEWIS floors, always pay attention to safety. The edges of the sheets may be sharp. Therefore, wear protective gloves and safety shoes.
Keep in mind that the sheets may be deformed if they are exposed to excessive loads.

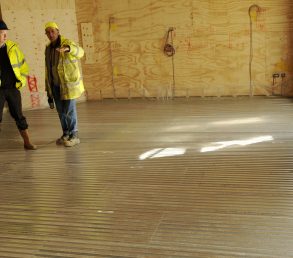
Laying the sheets
Standard laying procedure is a first row of sheets lengthwise, the first sheet with the blue print below, the following with the print on top. The adjacent row starts with a sheet with the blue print on top, etc. The sheets can also be laid “stretcher bonding”. The LEWIS sheets must be laid at right angles across the timber joisting, even if directly laid on the floor boards.

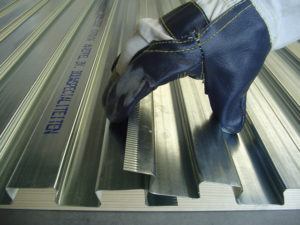
Lewis Deck being laid showing the overlapping of the sheets Crosscut overlaps
≥ 50 mm overlap if completely supported and nailed onto the existing floor. ≥ 100 mm overlap if laid on the timber joists or “floating” on resilient strips.
Crosscut overlaps are made by having the sheets “click” into each other alternately (one with the blue print below and one with the print up) over a length of 50 – 100 mm. Crosscut overlaps can be adjusted by sliding the sheets together or apart a bit more.
If LEWIS mineral wool resilient strips are used, first click the sheets together on a hard (not springy) surface!

Sheets are laid print side down then print side up to allow the overlap Lengthwise overlaps
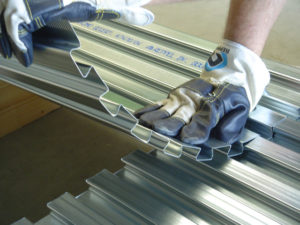
Overlaps should preferably not be limited to the side flanges. In order to make the LEWIS floor less vulnerable to construction traffic, it is necessary to also include part of the profile itself in the overlap. For this purpose, slide the side flanges as far as possible over the first profile. The upright part of the first profile will butt against the upright part of the first profile of the adjacent sheet.
Showing the overlap along the long edge of the sheet Edge detail
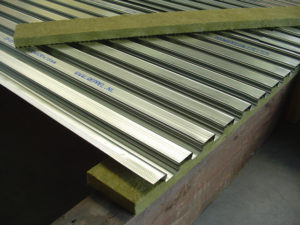
Allow for expansion at the edge of the floor using a flanking strip.
Lewis Mineral Wool flanking strip Shortening and cut-outs
To cut the LEWIS sheets to size, both widthwise and lengthwise, using a circular saw with a disc capable of cutting steel is preferable. Cut-outs can be made with the same tool, a grinder or with a jigsaw.
Cutting the Lewis Deck with a grinder
Attachment
The LEWIS sheets should be nailed into the upper flange where the sheets overlap on new timber joists and floor boards.
This can be done with regular wire nails or self-tapping screws. On old timber joists or floor boards, the sheets can be nailed into the lower flange. On steel beams, the LEWIS sheets should be pop riveted. Good attachment can also be achieved with Hilti rivets or dowels.
Note: When immobile connection is achieved by attachment with dowels or a nail gun, additional anti-shrinkage reinforcement is needed.
On concrete beams and masonry supports the sheets must be laid in cement mortar and temporary weighted until the mortar has set. Parker screws can be used on aerated concrete blocks.
Interconnected (wood-concrete) LEWIS floors
In order to prevent initial deflection of the timber supporting structure, it must be underpinned temporarily, e.g. by means of screw struts.
After the LEWIS sheets have been laid at right angles to the timber joists in the usual way, allowing sufficient overlap, a hardened LEWIS screw nail is driven into each lower flange. After attachment, the head of the nail should be at the same level as the top of the LEWIS sheeting.
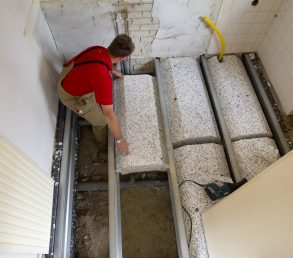
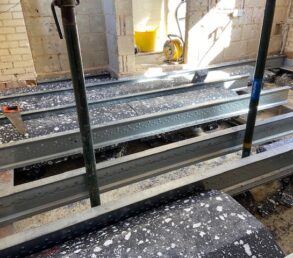
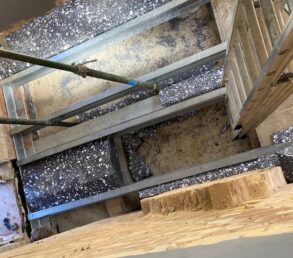
Floating sound resistant LEWIS floors
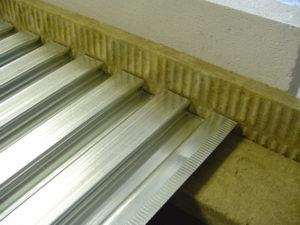
Install LEWIS mineral wool resilient strips – nominal thickness 25mm, width 100 mm (or the full width of the beam +10 mm), at 500 mm centres.
The strips can be laid onto the floor boards (over the joists!) or directly on the joists. If the centre-to-centre distance exceeds 800 mm and/or the load applied exceeds 2.5 kN/m2, LEWIS CDM resin-bonded rubber or LEWIS CDM PF resilient strips should be used.
Note: Lengthwise overlaps of the LEWIS sheeting, that are approx. 100 mm wide, must always be made over a supporting resilient strip. LEWIS mineral wool perimeter strips 20 mm thick and 100 mm high must be used.
Contact bridges for central heating ducts, pipes, etc. must be avoided by insulating with the same mineral wool.
In case of uneven drying and setting, the LEWIS concrete floor may be pushed up in the corners and along the edges (edge curl). Therefore, the LEWIS sheets must be temporarily fixed by using Parker screws that are screwed through wedge-shaped wooden flutes, alternatively a screw and washer can be used within a small plastic plant pot for the same purpose. Make sure the level of the flutes is the same as the thickness of the fine gravel concrete. After the concrete has hardened sufficiently, remove the Parker screws and the flutes and fill in the holes with mortar. As an alternative, the LEWIS floor can be supported against the storey above by using slats.
Lewis Mineral Wool Resilient Strips Waterproof (bathroom) LEWIS floors
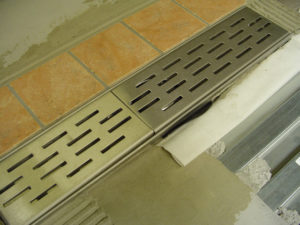
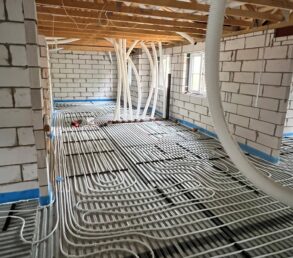
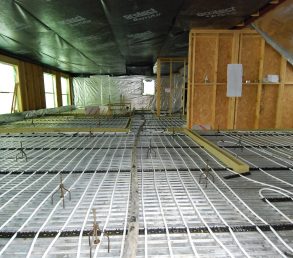
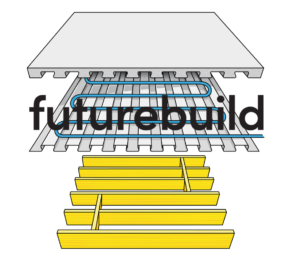
Lewis Deck Wet-Room drain LEWIS floors with underfloor heating
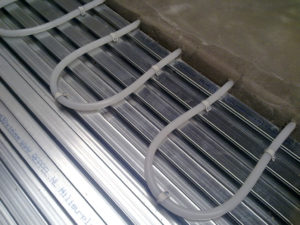
Keep a 10 mm space at minimum between the perimeter of the floor and the vertical walls by using LEWIS Mineral Wool Flanking Strips, for example.
Mount the floor heating pipes to the upper flange of the LEWIS sheeting by means of Clip-Rail and/or P-Clips and self-drilling screws. Do not attach the sheets themselves to the subfloor!
Lewis Deck and underfloor heating pipes
Concrete composition / application general
When installing the LEWIS sheeting, bear in mind that this initially serves only to support the mortar and will only start functioning as reinforcement after the concrete mortar has set.
Therefore it is not possible to lay a ceramic or natural stone floor finishing in the mortar directly. Terrazzo (granite) floors must always be applied to a smooth, finished concrete substrate.
Type of mortar floating floor:
- < 800 mm centres fine gravel concrete/liquid screed
- > 800 mm centres liquid screed. Alternative: fine gravel concrete + anti-shrinkage reinforcement at the crosscut overlaps (ø5-150).
Composition
- By weight:
- 1 part Portland cement
- 3 parts concrete sand (0-4 mm)
- 1.2 parts fine gravel (2-8 mm)
- By volume
- 1 part Portland cement
- 2.5 parts concrete sand (0-4 mm):
- 1 part fine gravel (2-8 mm)
For 1 m3 concrete: 285 litres Portland cement, 715 litres concrete sand and 285 litres fine gravel.
Lewis Deck and concrete Recommended thicknesses of concrete: Minimum thickness floor for housing: 16 mm + min. 20 mm = 36 mm standard floor for the majority of applications: 16 mm + 34 mm = 50 mm interconnected floor: 16 mm + 34 mm = 50 mm floor heating: 16 mm + 16* mm + 20/25 mm = 52/57 mm Note: Profile height of LEWIS sheet 16 mm + concrete cover layer = total floor thickness.
* to accommodate diameter of heating pipes.Usage
Floor thickness 16+34=50mm / average concrete thickness = LEWIS floor thickness 50 – 8 = 42 mm.
Underpinning
In case the intervals between the centres of joists are greater than 1200 mm or when the amount of concrete poured onto the sheets exceeds 50 mm, it may be necessary to temporarily underpin the LEWIS sheets.
Note: Have the supporting structure (joists, walls, foundation) professionally checked to ensure that it is strong enough to support the new LEWIS floor!
Application/drying
Use scaffolding boards placed at right angles to the supporting joists when pouring concrete. Screed the concrete mortar in lengths running at right angles to the grooves in the sheets.
Allow the fine gravel concrete mortar applied to the LEWIS sheeting to dry / harden gradually. Although it is always possible that a limited amount of cracking will occur in this type of thin concrete flooring, cracks due to shrinkage and the so-called burning of the concrete mortar can be prevented to a considerable extent. Cover the finished mortar floor with polyethylene foil and do not apply any stress to the floor until it has hardened sufficiently!
General
Fine gravel concrete, tiles, flagstones, natural stone or terazzo must be applied according to the current standards and regulations. Tile adhesive may be used.
Latest Blog
CDI 2026

2026 Exhibition Dates
20th January 2026
2026 might only be a couple of weeks old but we are already turning our attention to the first couple of exhibitions that we have organised for this year. This year we are hoping to be at more events than…
View All
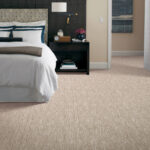
Is Underfloor Heating Compatible With Carpet?
11th October 2024
At Every Exhibition We Get Asked Can You Have Underfloor Heating With Carpet? Hopefully here we explain why the answer to that is YES. With carpet providing a soft, luxurious feel to your home many people ask whether underfloor heating and carpet can go…
View All
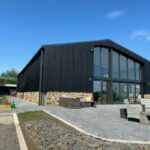
Cow Close Barn with Heat Pump and Underfloor Heating
26th May 2023
Paul M contacted us in early 2022 to discuss the use of the Lewis Deck system following a recommendation by his Ground Source Heat Pump system installer. We worked through the drawings and provided a quote, the Lewis Deck and…
View AllChat Live
Hi you're speaking to Dave, how can I help.Website by Indigo